Photo by Maria Kovalets on Unsplash
Beloved,
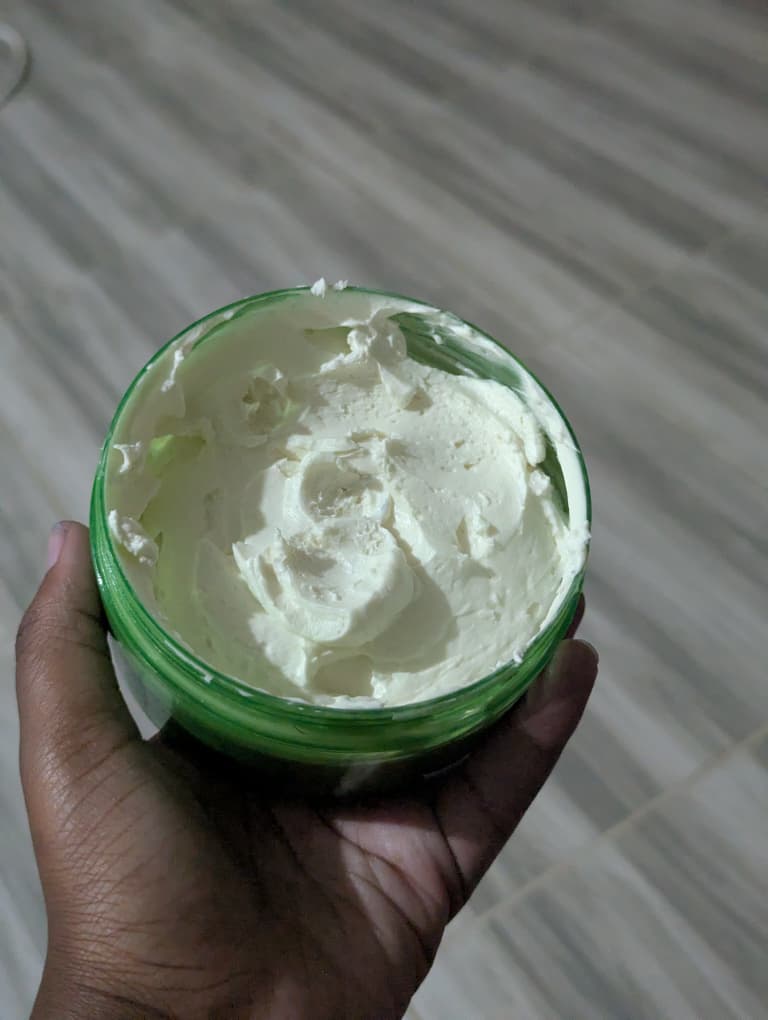
After figuring out how to make my own soap, naturally my next course of action was learning how to make my own body butter. Interestingly enough, even though I started with soap making, it’s the butter that I first started using daily on my entire body.
I’ve been using my own butter instead of store-bought ones since around November last year, and though it was based purely on whims and vibes, it’s been one of my better skincare decisions.
Ever since I started using it, my skin has been brighter, more moisturised, and less prone to breakouts. Even my mom noticed. Not only has it been really beneficial for my breakout-prone skin, it’s also quite easy to make. So if you’re curious about how to make your own body butter, here’s a simple step-by-step guide on how to do it.
Disclaimer:
These are pure experiments on my side. I quite literally started mixing things in my kitchen and putting them on my very sensitive skin because, at this point, no breakout can faze me anymore. I’ve also been doing all this based on vibes.
And as much as it’s been beneficial for my skin and is 100 percent mom-approved, it is not dermatologist-approved. Please patch test, research, and proceed wisely.
What you’ll need, what they are, and where to get them:
Ingredients
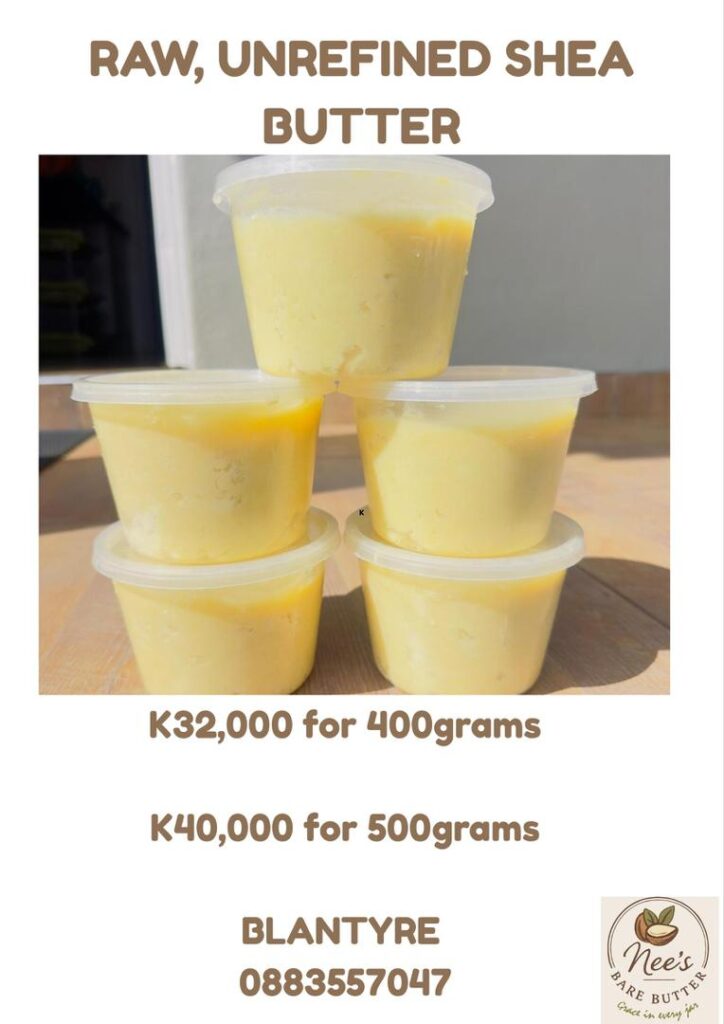
- Carrier Butters: The first thing your body butter will need is, well, a butter. Carrier or base butters are plant-derived oils that are solid at room temperature. These will be the backbone of your body butter. I haven’t used many base butters, but here’s a post of some you can check out (also has carrier oils). I personally use shea butter, which I get from my friend, Grace (poster below.). Pro tip, get the 500 gram one. Best value for money, and trust me, it lasts. P.S. she also sells cocoa butter.
- Carrier Oils: Carrier oils, also called base oils, are plant-derived oils you add to your butter to boost its skincare benefits. Unlike butters, most of these oils are liquid at room temperature, with the exception of unfractionated coconut oil, which you can still use. This helps make your butter more spreadable on the skin. I haven’t experimented much with different oils, but here’s a post that might help you choose what works for you.I personally use coconut oil from Chipiku, the cheapest 100 percent pure one litre cooking one I can find. It’s around MWK 40,000, but it lasts quite a while, so there’s value for money.
- Essential Oils: Essential oils are the concentrated essence of a plant. They can come from flowers, bark, roots, or leaves, and they smell very strongly. I mainly use them to scent my butter, but apparently they have their own skincare benefits too. Here’s a post that lists some of them. My aura-farming best friend got me my first batch from Trudy’s. Not sure about current prices, but in September 2025 they were around MWK 4,500 each. Don’t let the small bottles fool you, they last.
- Glycerine: Glycerine is a humectant. This means it attracts moisture from the air to your skin, like your skin becoming a tiny sponge. It helps keep skin soft and moisturised. You probably already know where to get glycerine, but in case you’re Patrick Star incarnate, you can find it almost anywhere. I got mine from Sana, but most big shops and even local grocers have it. Just get the cheapest pure glycerine you can find.
- Starch: When I made my first batch, I had not accounted for how greasy it would be. It was way too oily for my liking. Yes, putting a bunch of oils together and not expecting oiliness is bold. Most recipes recommend arrowroot powder to reduce greasiness, but I had never heard of arrowroot. So I did some Googling and found that most starches can help, even cornstarch. And I was like, cornstarch? As in Maizena? So I bought Maizena and it worked perfectly. Yes, putting what is technically flour on your skin feels questionable, but trust me. You can get Maizena for under MWK 10,000 at Sana or Chipiku, and you use so little that one pack might last over a year.
Tools
- An electric hand whisk: This is what you’ll use to whip everything together. It transforms your mixture from an oily [solid] puddle into that soft, fluffy, cloud-like butter you actually want to put on your skin. It also adds air into the mixture, giving it that light, spreadable texture. If you don’t have an electric whisk, you can use a regular fork. I recently discovered this through struggle and determination. Just know it takes time, arm strength, and patience. You’ll need to whisk in stages, letting the mixture cool, then whisking again, and repeating until you get that fluffy consistency.
- Measuring cups or spoons: Now, technically, you should measure your oils and additives properly, and I recommend that. However, my own measurements are guided by vibes. Still, try to measure and take notes so you can figure out what works best.
- A heat-resistant container or microwave-safe bowl: This is what you’ll use to melt your butters and oils. Make sure it can handle heat without joining the mixture.
- A pot: If you’re not using a microwave, I personally don’t have one, you’ll melt your ingredients using the double boiler method by placing your container inside a pot with a bit of water. The water heats up and gently melts everything.
- A stove or any reliable heat source: Gas stove, electric stove, hot plate, mbaula, whatever works.
- A fridge: You’ll need this to solidify everything again. Yes, it feels counterproductive. Just go with it.
- A jar: Those random jars you kept for years saying I’ll need them one day, this is their moment.

Directions
Second disclaimer:
Again, I usually measure things using vibes and whims, and I’m constantly experimenting. But here are the exact measurements from my last two batches.
- Add butters and oils:
Add 5 tablespoons shea butter and 3 tablespoons coconut oil into your heat-safe container. - Add glycerine:
Add 1 tablespoon glycerine. - Add essential oils:
Add your preferred essential oil blend. - Melt:
Place your container in a pot with some water and heat it. - Stir until melted:
Stir until everything is fully melted and combined. - Chill the mixture:
Place it in the fridge for 45 to 60 minutes until solid. - Make starch solution:
Take 3 tablespoons of hot water and mix in half a tablespoon starch. Stir until smooth. - Whip:
Add the starch solution to the solidified mixture.
Whisk on low until it becomes white, creamy, and fluffy. - Store:
Keep your body butter in a cool, dry place. Who knew I’d ever say that.

Extra Notes and Things I’m Still Figuring Out
- It melts:
If it gets too hot, your butter will turn back into a puddle. Don’t panic, just pop it in the fridge and whip again. - Essential oil blends:
Shea butter, coconut oil, and cocoa butter all have strong nutty scents, which don’t always mix well with everything. I like using vanilla and coconut. I once tried ylang-ylang and peppermint which pleasantly surprised me.
Anyway, that’s all from me. Happy body butter making.